You should be focused on hosting successful events, not endlessly exporting CSV files and burdening your team with data entry. This is where event automation can be a huge time saver.
What if you could set up your own event automation Slackbot in 10 minutes or less?
And what if you didn’t need to write a single line of code?
And what if there are over 100+ other apps you could connect to as well- equally simply and easily?
In this tutorial, you’ll learn how to connect Swoogo with Slack through Zapier.
Once you’re through with this guide, you’ll be able to automate all the tedious event planning tasks you’ve been avoiding.
Event automation and APIs
Automation can be used in a lot of areas for event planners, but probably the most obvious and useful case for event automation is exporting data. Instead of having an event planner waste their time pulling data out of someone’s registration record and putting it somewhere else, this is a task that can be automated.
For example, let’s say you want certain information from your registrant’s data (such as meal type) exported into Google Sheets. You can automate the task that once the attendee registers through Swoogo the information on meal type can be sent to Google Sheets, Slack, Hubspot, Salesforce, Mailchimp, or Marketo. You get the idea—the information can be sent pretty much wherever you want it to be.
Swoogo can help you make your event planning easier by automatically sending event and/or registration data from Swoogo to one, two, three, or even more connected apps.
All of this magic happens through the incredible superpowers of APIs.
Despite being a little technical, there is nothing actually magical about APIs. An API (Application Programming Interface) can be used as a way to have different apps talk to each other.
Imagine Facebook spoke Spanish and Twitter spoke Dutch. They wouldn’t understand each other, would they? With API’s, both Facebook and Twitter agree on a common language and therefore can exchange data back and forth easily.
If this is still a little vague for you and you want to get a little more background, here’s an amazing 3 minute video by Mulesoft which explains exactly what an API is, in non-technical terms.
The name Application Programming Interface suggests you need to program something, but luckily this has already been done by our friends at Zapier.
What is Zapier?
Zapier is an online automation tool that connects your favorite apps (over 1000+) through an easy-to-use interface without the need to write a single line of code. Think of it as the middleman or interpreter between apps that speak different languages.
With Zapier you can connect two or more apps to automate repetitive tasks without coding or relying on developers to build the integration.
Zapier offers a free version of their tool to get you started, and everything we show you today can be done without upgrading your account.
(*You need to be using Swoogo for your event marketing & online registration software. If you don’t have that yet, book in your free tour here.)
How to use automate your events with Swoogo and Zapier
Here are a few creative ways you can use Swoogo together with Zapier:
-
Send Slack notifications to your team as soon as someone updates their registration
-
Save new Swoogo registrants to a Google Sheets spreadsheet or Airtable
-
Add new Swoogo registrants to a Mailchimp list
-
Add new Swoogo events to Google Calendar
-
Use Swoogo registrants to create Zoom webinar registrants
-
Automatically post new Swoogo events to your LinkedIn company page
-
Send emails from Gmail when new attendees register through Swoogo
A Few More Event Automation Use Cases
-
Convert those leads: Find person or company data and qualifications based on an email address.
-
Translate a speaker biography from English to Dutch: Use the Translate app Zapier provides
-
Format the registration date and time from DD-MM-YYYY to MM-DD-YYYY to keep your data consistent
-
Send an SMS to VIP registrants in Swoogo
Now that you’ve gotten a taste of what’s possible, let’s jump into the tutorial to see how to automate your event tasks with Swoogo and Zapier.
A tutorial: Event automation with Swoogo and Zapier
In this tutorial, we will show you how to automatically send a Slack message to your team as soon as someone registers for your event through your website.
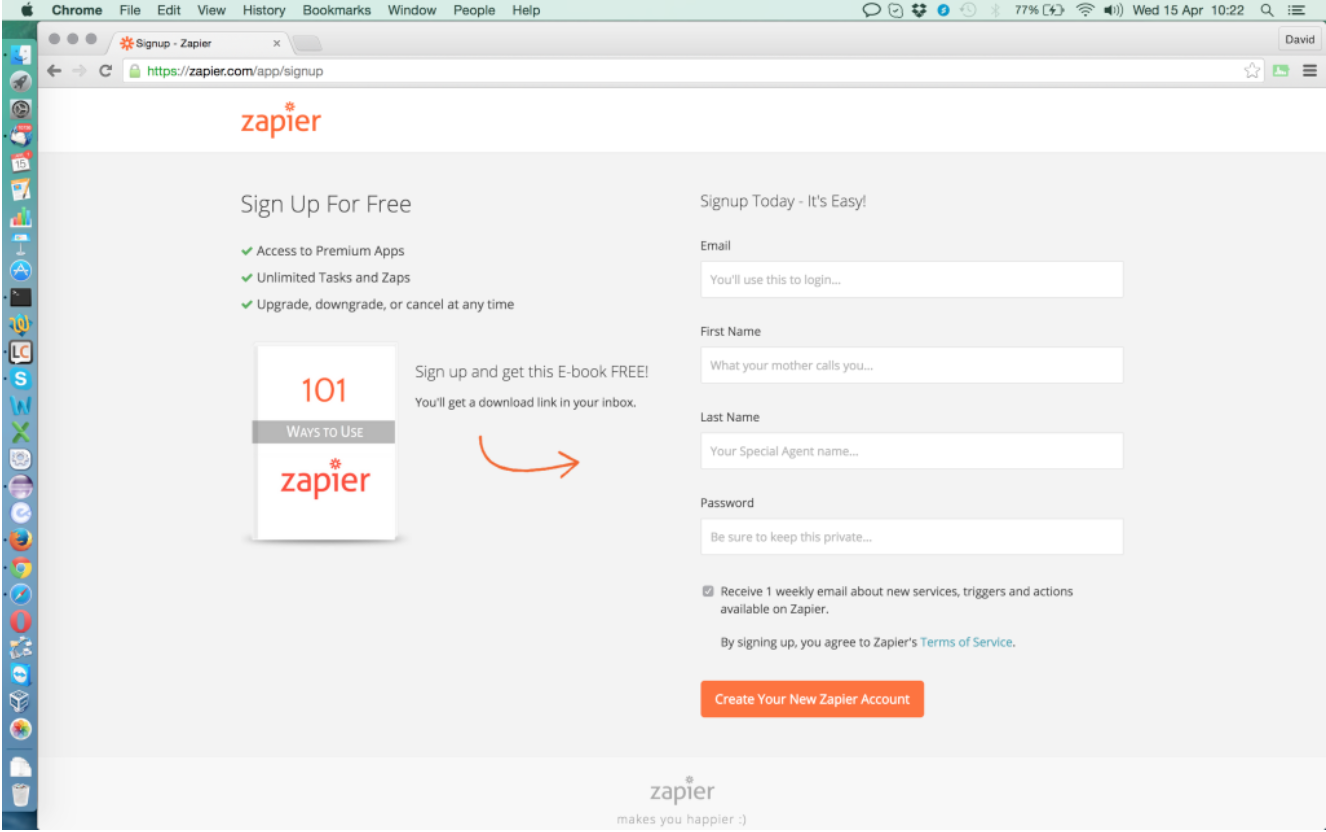
Step 1: Create a free Zapier account
Just head over to zapier.com and sign up for a free account.
The free account includes up to 5 Zaps (think of a zap as a connection amongst apps.) With the free account you can create 2 steps in each zap, for example:
-
If I receive a new registration in Swoogo (Step 1), create a new row in my Google Sheet named xyz (Step 2)
-
If a new event is created in Swoogo (Step 1), create a new Trello card (Step 2)
For most use cases, 2 steps are fine. If you need multiple steps, you can opt-in for the Starter account in Zapier for 20 bucks per month.
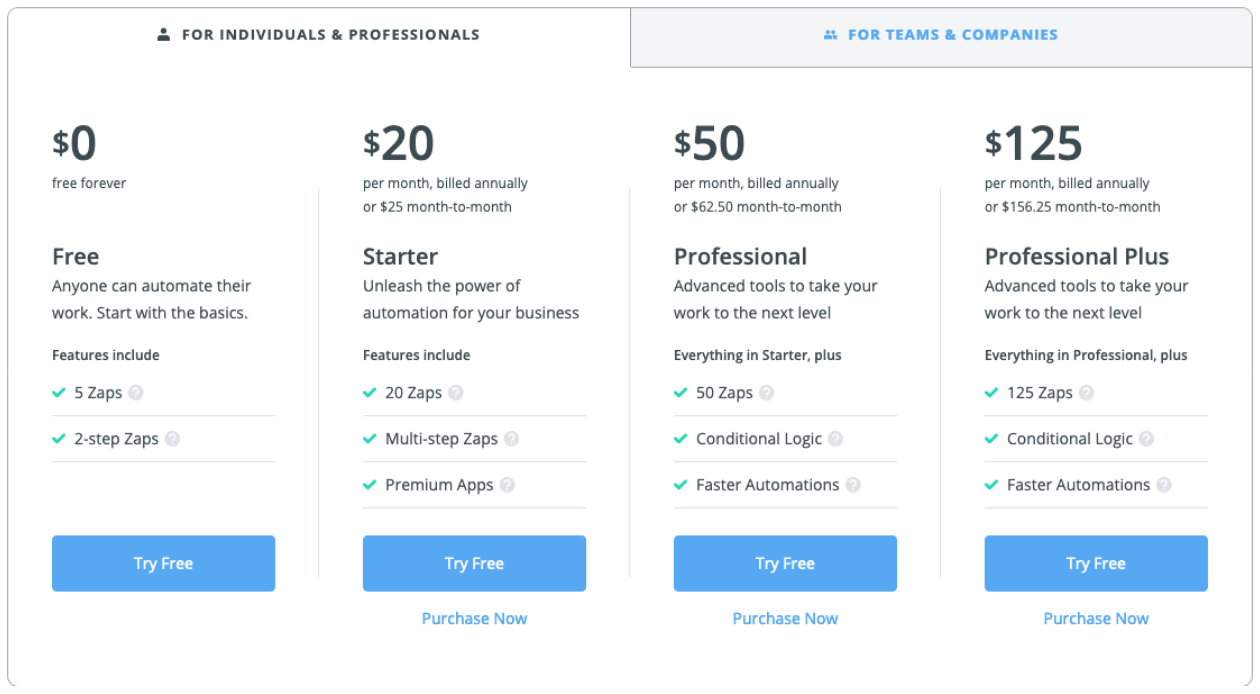
Starter also includes Premium apps like Zoho CRM and allows for 20 different zaps in total.
In this tutorial, I’ll use the free account I’ve just set up.
Step 2: Create your first Zap
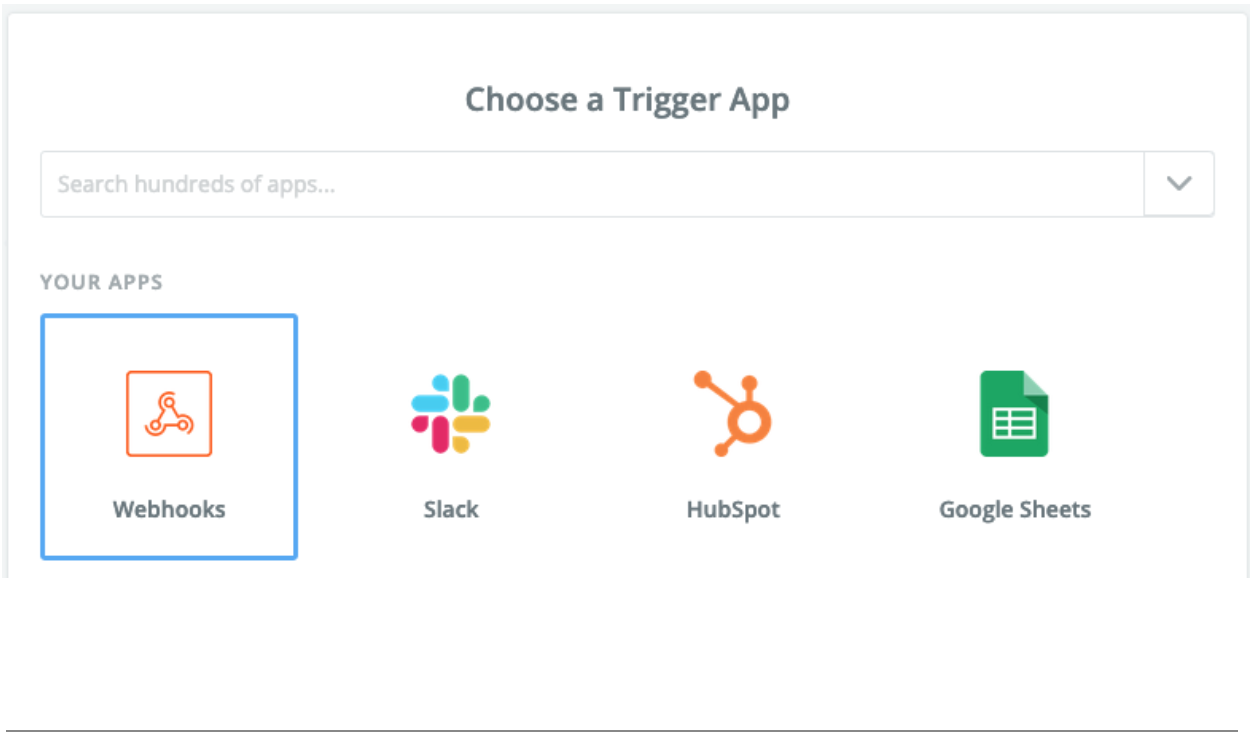
Click on the orange “Make a Zap” button in the top right corner.

Start typing webhook in the search bar and select “Webhooks by Zapier” as your trigger app.
What the heck is a Webhook?
Webhooks are simply automated messages sent from apps when something happens.
They contain a message, a payload, and are sent to a unique URL—essentially working like an app’s phone number or address.
Next, select Catch Hook.
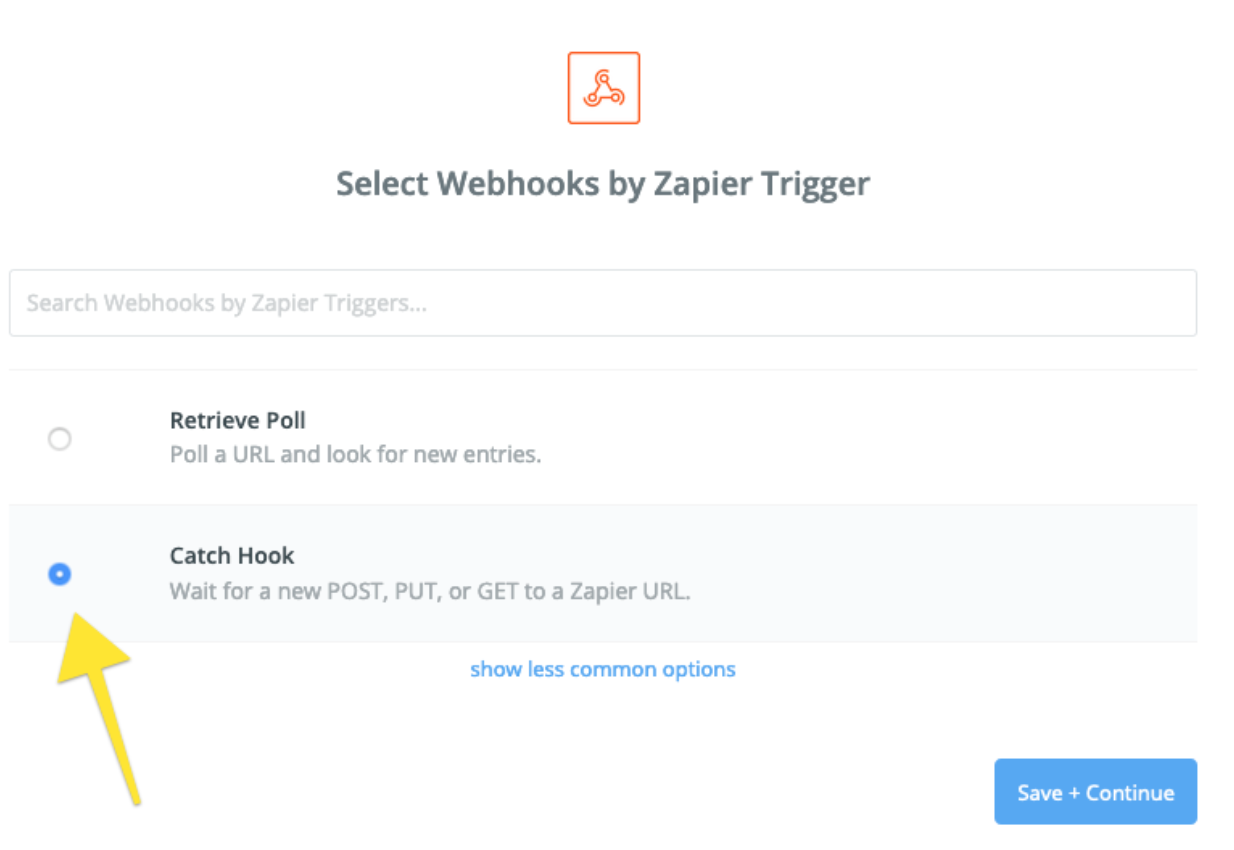
This will tell Zapier to patiently listen to your Swoogo account and as soon as an action happens, Swoogo will notify that URL (Zapier) about it and pass the data along.
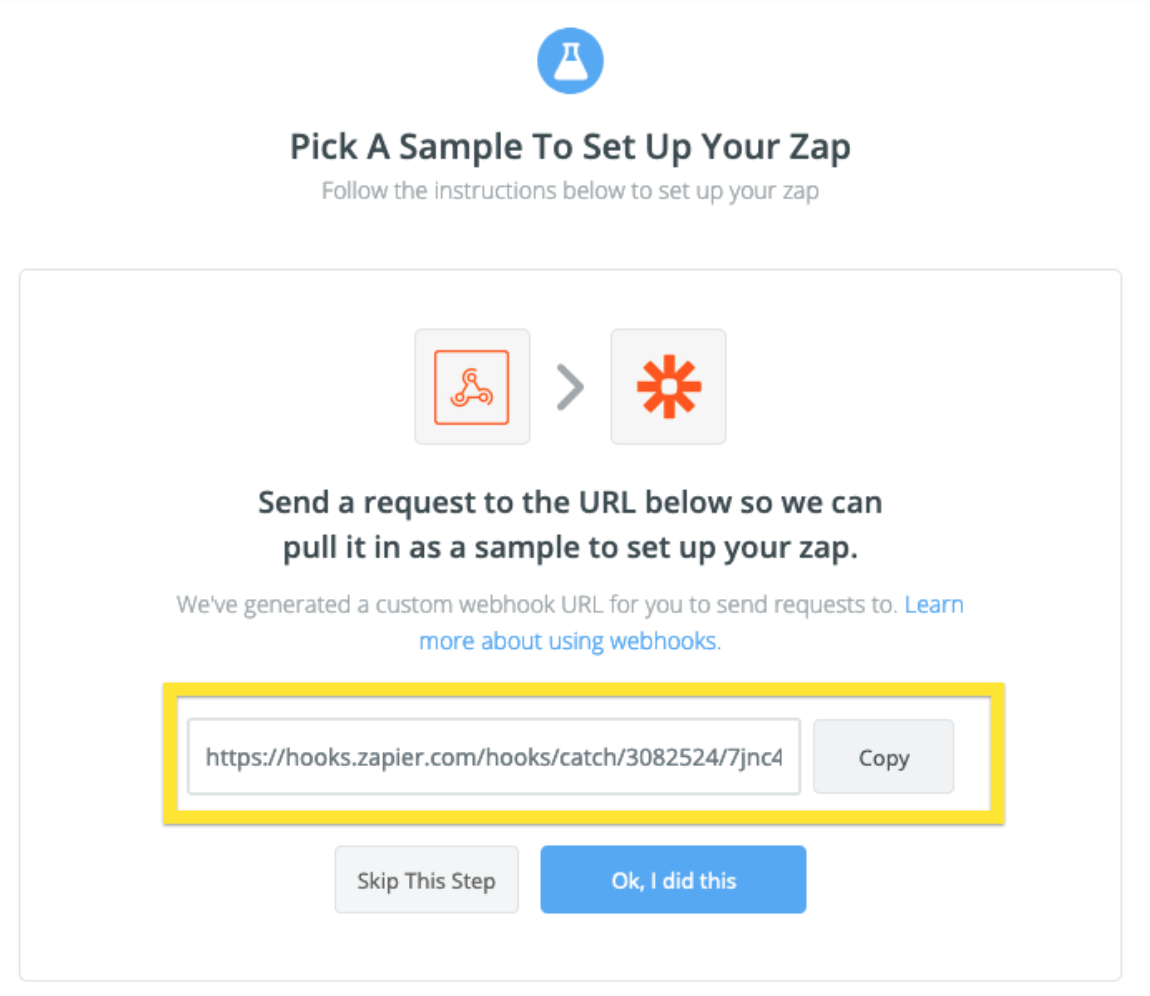
Next, Zapier will provide you with a unique webhook URL which you need to copy.
Step 3: Create A new webhook in Swoogo
In Swoogo, click on your profile picture in the top right corner of the navigation bar. Select “Account Setup”.

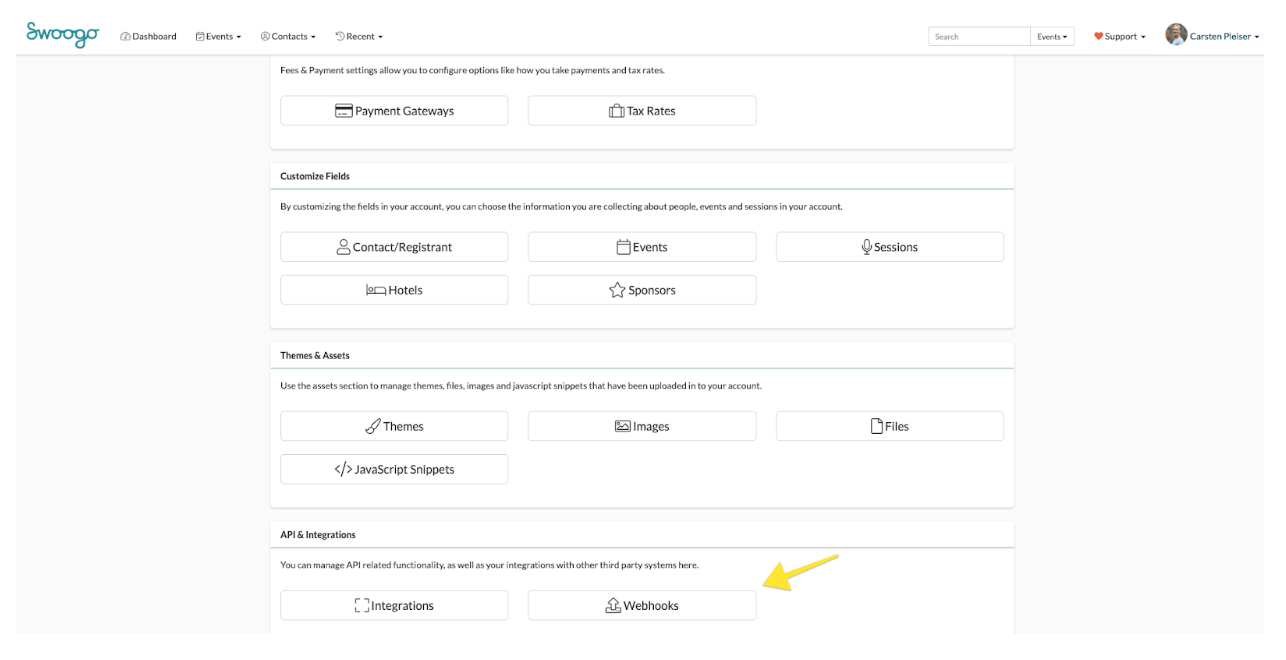
Scroll down until you see the API & Integration section.
Select Webhooks.
Decide if you want to create an event or a registration webhook. Event webhooks are useful if you want to send event data to Zapier, e.g. when a new event has been created, updated, etc.
Registration webhooks are useful if you want to capture registrant data or changes to the registration record.
Next, you need to configure the webhook itself.
-
Give it a name, e.g. Swoogo <> Slack Integration (Zapier)
-
Paste the URL from Zapier into the URL field
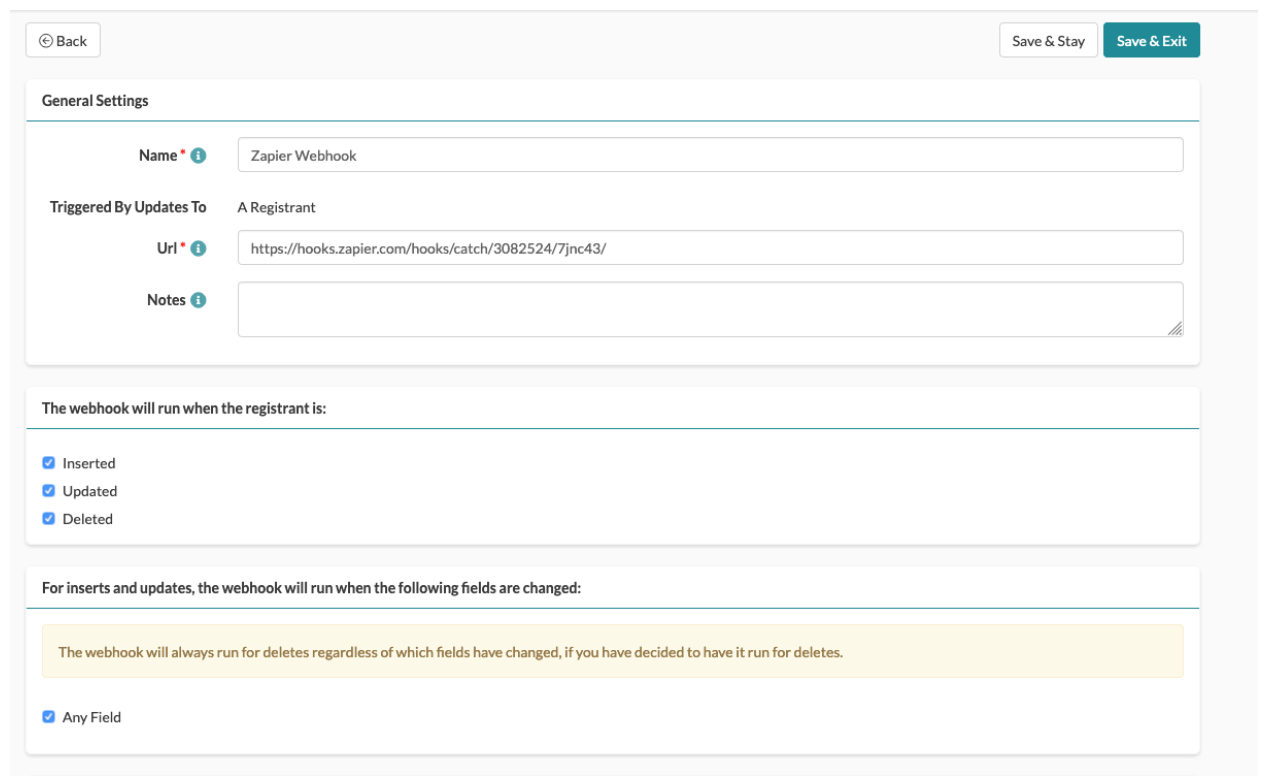
Decide if you want the webhook to run when a new registration is created, a new registration is updated or deleted.
You can even decide which fields you want to send through to Zapier and what events (if any) you would like to apply the webhook to.
Step 4: Do a test registration
Hopefully, you’ll already know how that works.
Step 5: Click “continue” on your Zapier setup
Zapier will pull that registration you’ve just created to test if everything is working correctly.
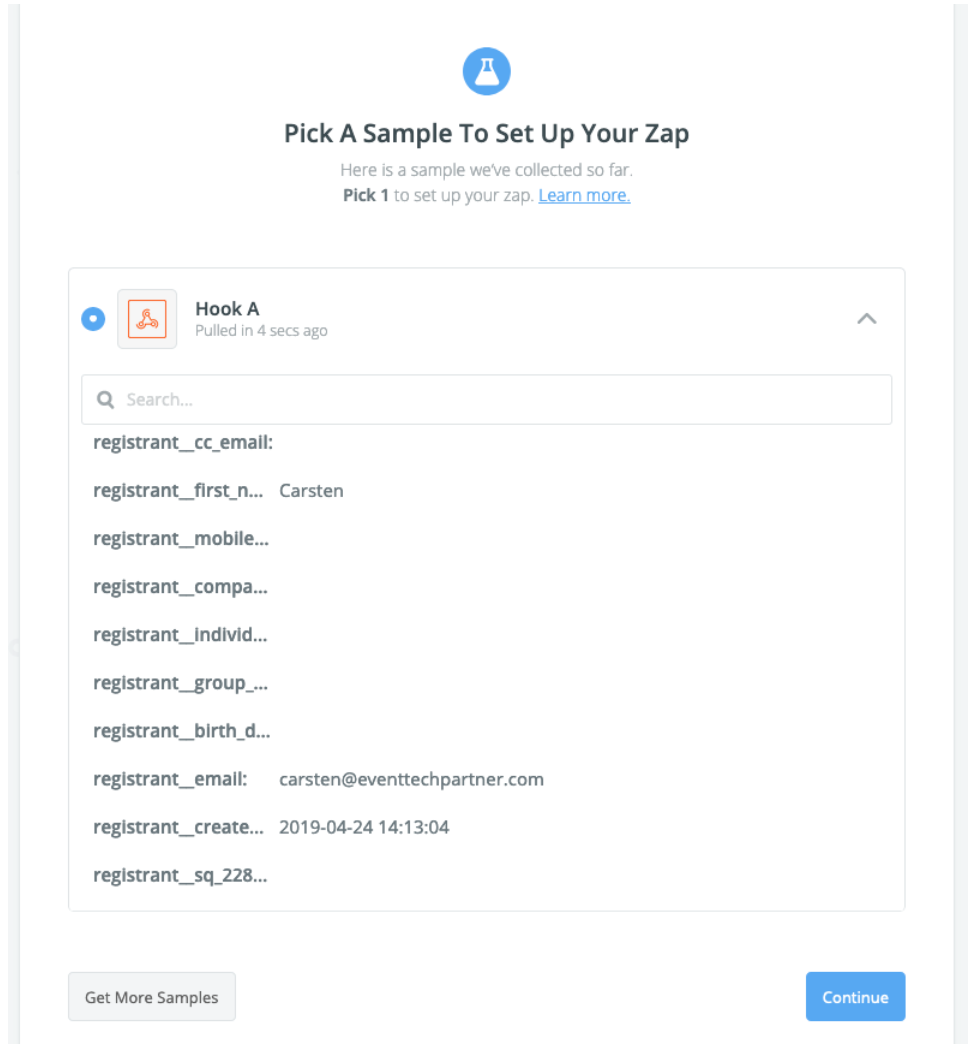
If it says something along the lines of “Hook A” (Pulled in xx seconds ago), you can make a happy dance because everything is working as expected.
You will now be able to see your test registration fields and the data associated with it.
Don’t worry. This is just a test and no actual data will be pulled in unless you activate the Zap, which we’ll do in the last step.
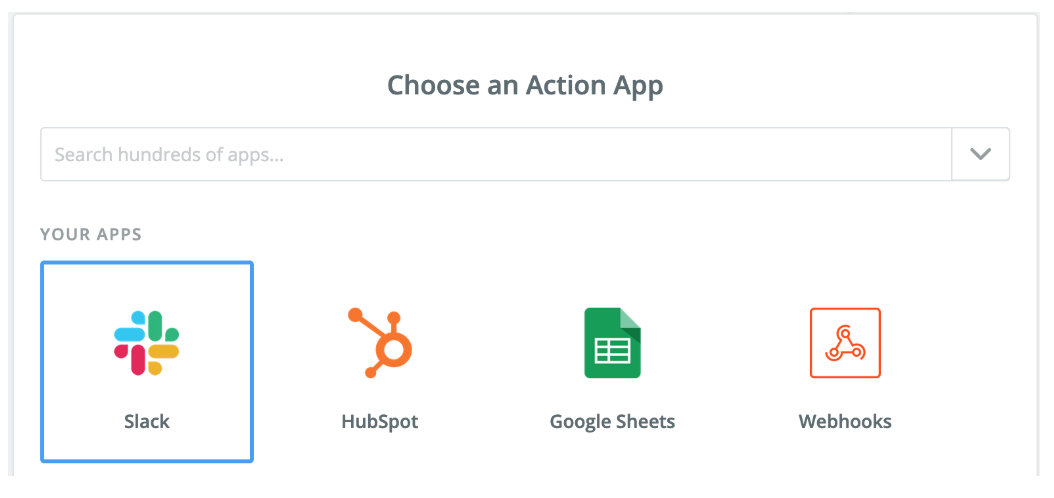
Step 6: Select the slack action
In the next screen, Zapier will ask you what action it should take once a new webhook event has been noticed.
Take your time to explore the options, because there are plenty available.
Feeling a little geeky?
With Zapier, you can even implement a lightweight lead scoring system.
Zapier can pull in additional information about the person who registered, e.g. their city, location or state. Or you can translate data into a different language before sending it anywhere.
For example, Swoogo gives you the date and time of the registration in a certain format, but maybe you want a different format or localize it according to your country.

But let’s not get carried away with our primary goal, sending a Slack message for each new registrant.
Of course, we would want to create Slack as an Action, so this is what we select from the options available.
Zapier gives you loads of options here, but I’m selecting “Send Channel Message” here.
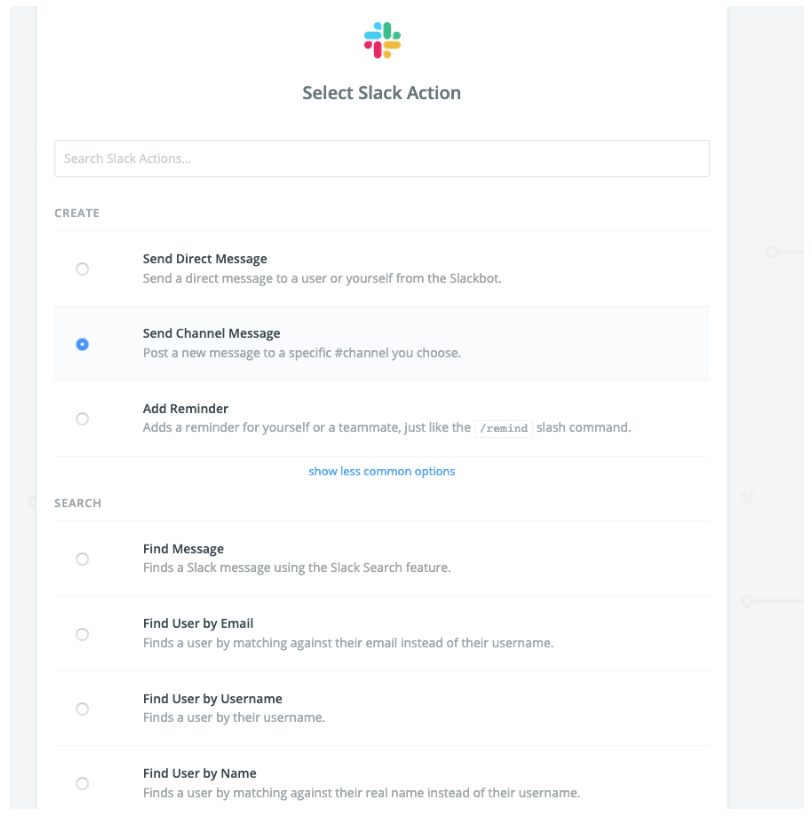
Next up, follow the steps and connect your Slack account.
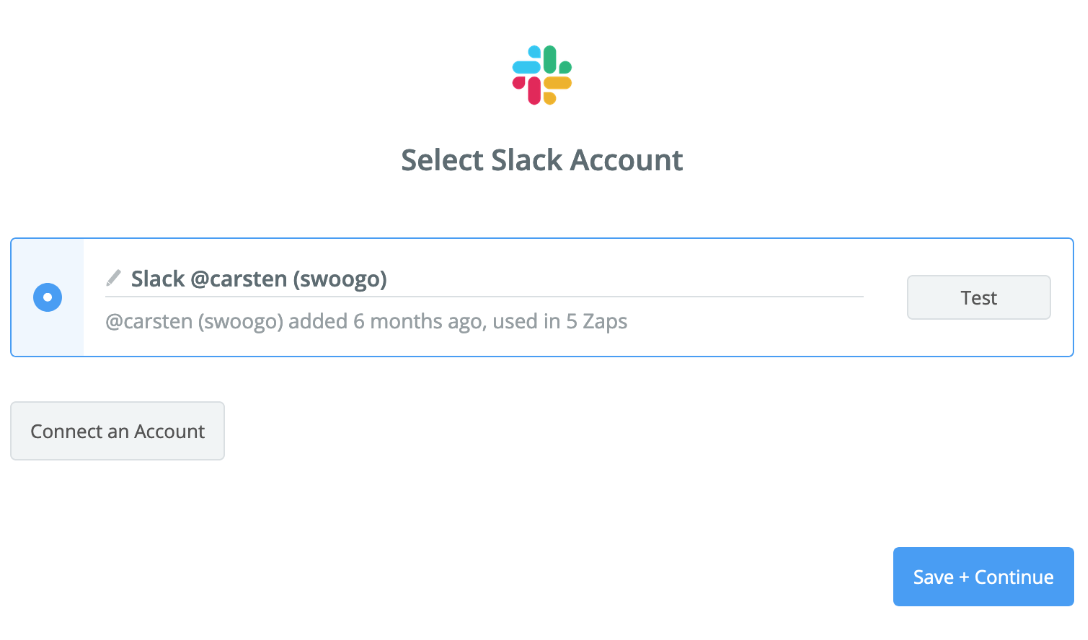
Done. Click Save + Continue.
Step 7: Setup the slack channel message
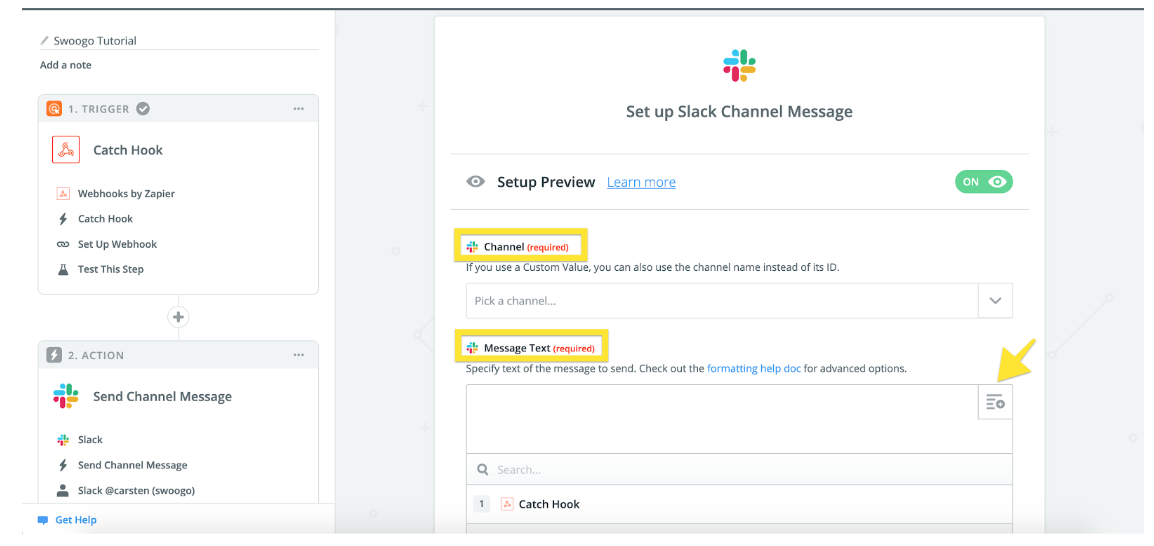
In the next screen, you will need to define the Channel (clicking on the arrow will pull in all the available channels in Slack).
The Message Text can be configured as well. Here it’s important to click the icon on the right and select the fields you want to use in your text.
Play around with it and select the fields that make most sense for you. Zapier also gives you great formatting guidelines.
Scrolling further down, you have plenty more options to configure your Slack bot, but we’ll skip that for now.
I’ve opted for a text that ultimately looks like this. For your custom text, feel free to send a test message to Slack first to see how it looks.
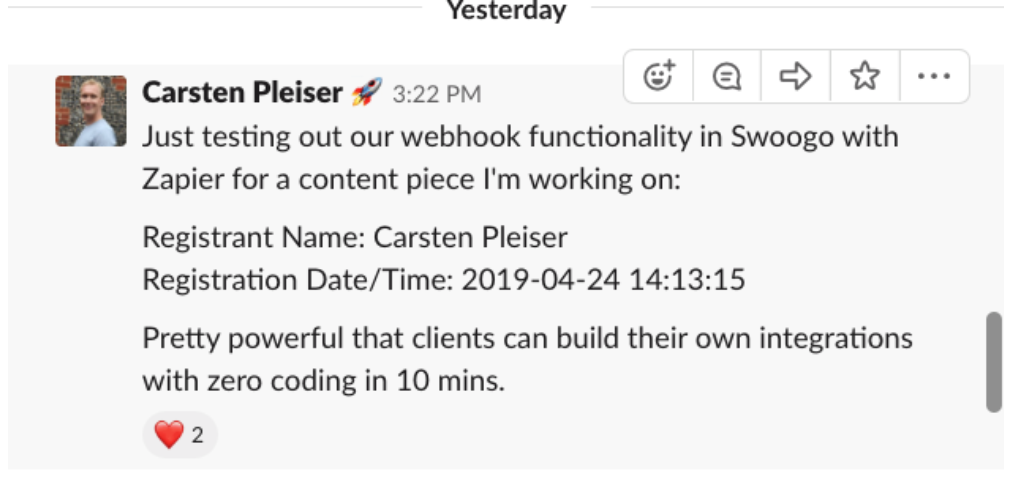
If your test was successful, you’ll see this.

Cool, no?
Wrap up
Congrats! You just built your first event automation Slack Bot in very little time.
Zapier is a powerful tool that connects your favorite apps, and as an event organizer, you want best-in-craft event tech that can pair with event automation tools.
You can dive a lot deeper into Zapier and create custom zaps for your events and the tools you use.
I recommend playing around with Zapier’s free plan, see what triggers and actions are available for the apps you use, and work out where they could help you automate your events. You can upgrade from there if needed.